
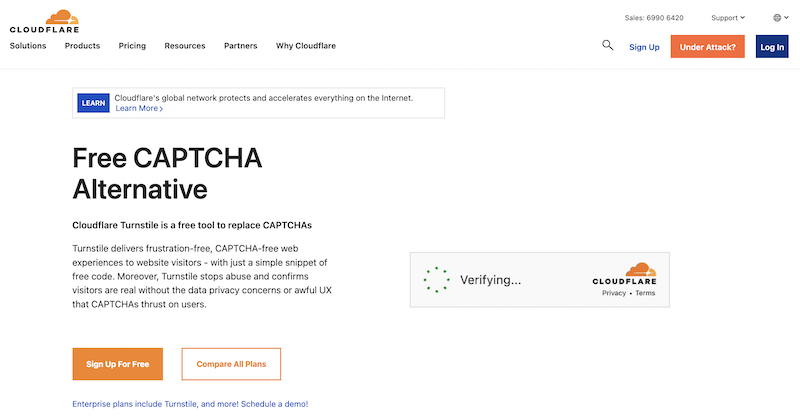
There are many (free) solutions to prevent SPAM coming through your webforms. One of the (common) ways is to use a CAPTCHA, such as reCAPTCHA or hCaptcha. One main problem that CAPTCHAs bring is a non-intuitive user experience. Challenges are hard to solve, sometimes impossible to solve (even after switching to audio mode! Hey Amazon).
To tackle this problem, Cloudflare has developed a CAPTCHA alternative called Turnstile. Turnstile does not require user interaction and yet can validate that your users are real. Also, you do not need to be routing your network via Cloudflare to be able to use Turnstile.
In this post, I will show you how to use Cloudflare Turnstile with PHP in an example to secure a basic web form. This tutorial is intentionally made simple and does not require any framework of library to implement. You can however adapt it anyway you want. Do note that Cloudflare Turnstile is still in beta, as of the date of this writing.
Step 1 : Register for a Cloudflare account and sign in
This is pretty simple. Just go to https://www.cloudflare.com/products/turnstile/ and click “Sign Up For Free”. Once done, login to your account. You will be redirected to the Cloudflare dashboard.
Step 2 : Click on Turnstile and add new site
Next, on the left hand menu, click on “Turnstile” and click the “Add Site” button. Follow the on-screen instructions to add your site name.
Under “Domain”, you can enter all the domains that you want to use Turnstile on. In my case, I added clifford.io and clifford.local (dev env).
Under “Widget Mode”, there are 3 options. Below is a quick explanation of each option. Note that while each option is different, the implementation method is the same. You can switch the widget mode at any time from the dashboard.
- Managed – this is the only option that Cloudflare may deterministically use user information to show a checkbox for users to check. Don’t worry, no hard image or audio challenges.
- Non-interactive – for this option, user will only see a loading indicator while Turnstile is running the browser challenge behind the scenes.
- Hidden – this option is completely invisible to users.
For this tutorial, let’s go with the “Managed” option. Click “Create”.
You should now see a Site Key and a Secret Key. The Site Key is what you will use to embed in your web form. The Secret Key is what you will use to authenticate the request with Cloudflare on the server side.
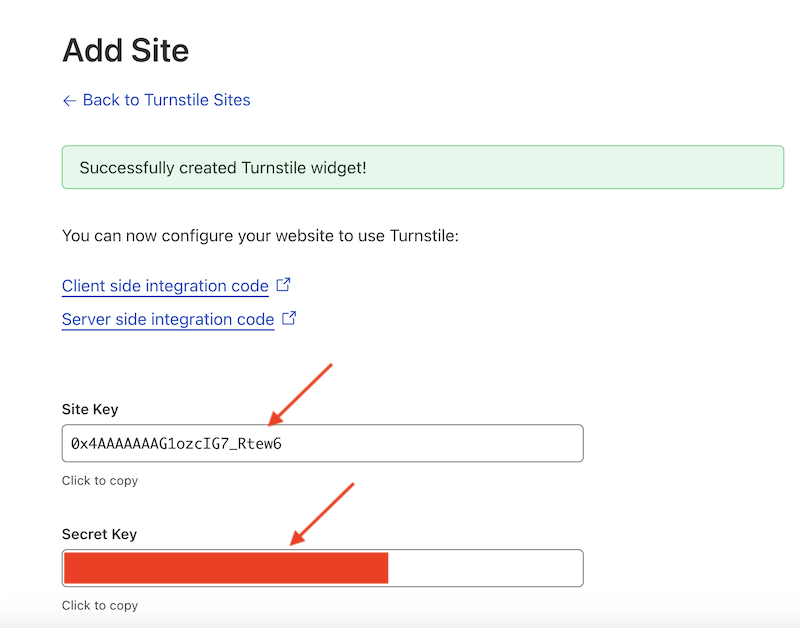
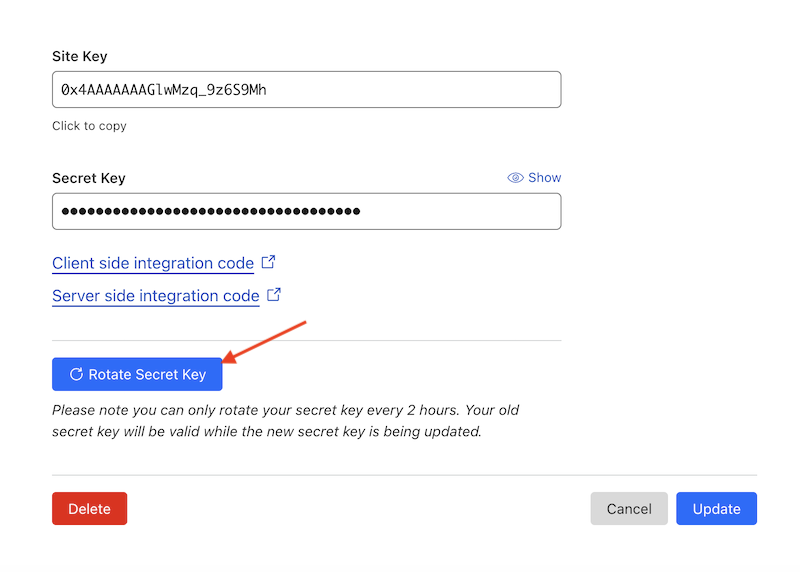
Please store the Secret Key safely and do not share it. If you think your Secret Key has been compromised or leaked, you can return to the dashboard to reset it. Just click on “Rotate Secret Key”.
With the Site and Secret Keys on hand, let’s jump to the implementation!
Step 3 : Setting up the web form
First, we will set up a simple web form from scratch, with a single form field to simulate submission of form data after the Turnstile challenge. As the Turnstile widget is in “Managed” mode, you will see a physical widget right appearing below that single form field, above the submit button. Of course, you can place the widget wherever you like. See a demo here.
Here’s the full code for the web form page – index.php
<!doctype html>
<html lang="en">
  <head>
    <meta charset="utf-8">
    <meta name="viewport" content="width=device-width, initial-scale=1, shrink-to-fit=no">
    <meta name="description" content="">
    <meta name="author" content="Cliff">
    <title>Cloudflare Turnstile Demo</title>
    <style>
      body{
        background: #ffffff;
        box-sizing:border-box;
        font-size:16px;
      }
      form{
        width:100%;
        max-width:500px;
        margin:auto;
        border:1px solid #cccccc;
        border-radius:12px;
        padding:20px;
      }
      h1{
        text-align:center;
        max-width:500px;
        margin:auto;
      }
      p{
        text-align:center;
        max-width:500px;
        margin:10px auto;
      }
      input[type=text]{
        width:80%;
        padding:10px;
        margin-bottom:10px;
      }
      label{
        font-weight:bold;
        margin-bottom:10px;
        width:100%;
        display:block;
      }
      button{
        padding:10px;
        margin-top:10px;
      }
    </style>
    <!-- include the cloudflare turnstile library here  -->
    <script src="https://challenges.cloudflare.com/turnstile/v0/api.js" defer></script>
  </head>
<body>
  <h1>Cloudflare Turnstile Simple PHP Demo</h1>
  <p>This is an example of the Cloudflare Turnstile <b>managed mode</b> widget implemented with PHP validation on the server side.</p>
  <p>Field 1 is just a regular field in your form.</p>
  <form action="submit.php" method="post">
      <label for="field1">Field 1</label>
      <input type="text" name="field1" id="field1">
      <!-- your site key goes here -->
      <div class="cf-turnstile" data-sitekey="[use your own site key]"></div>
      <button type="submit">Submit</button>
  </form>

</body>
</html>
From the code above, take note of these 2 important lines:
Important Note 1 : The Cloudflare Turnstile Javascript library must be included.
<script src="https://challenges.cloudflare.com/turnstile/v0/api.js" defer></script>
Important Note 2 : The HTML div element with your own Site Key must be included somewhere in your web form.
<div class="cf-turnstile" data-sitekey="[use your own site key]"></div>
In this step, Turnstile will generate a “cf-turnstile-response” hidden form field to be submitted with your web form. This will need to be retrieved in the next step for server-side validation. Let’s go to step 4.
Step 4 : Setting up server-side validation with PHP
In this step, we will send a HTTP POST request to Cloudflare servers to perform the Turnstile challenge. This requires a few information:
- Your Secret Key
- The remote IP address of the server making the request ($_SERVER[‘REMOTE_ADDR’])
- Response from the hidden field in the previous step ($_POST[‘cf-turnstile-response’])
Here’s the full code for the web form submission page – submit.php
<?php
    $secret = '[your own secret key]'; /* Store this somewhere secure */
    $remote_addr = $_SERVER['REMOTE_ADDR'];
    $cf_url = 'https://challenges.cloudflare.com/turnstile/v0/siteverify';
    $token = $_POST['cf-turnstile-response'];

    // Request data
    $data = array(
        "secret" => $secret,
        "response" => $token,
        "remoteip" => $remote_addr
    );

    // Initialize cURL
    $curl = curl_init();

    // Set the cURL options
    curl_setopt($curl, CURLOPT_URL, $cf_url);
    curl_setopt($curl, CURLOPT_POST, true);
    curl_setopt($curl, CURLOPT_POSTFIELDS, $data);
    curl_setopt($curl, CURLOPT_RETURNTRANSFER, true);

    // Execute the cURL request
    $response = curl_exec($curl);

    // Check for errors
    if (curl_errno($curl)) {
        $error_message = curl_error($curl);
        // Handle the error the way you like it
        echo 'cURL Error: ' . $error_message.'<br>';
    }else{
        /* Parse Cloudflare's response and check if there are any validation errors */
        $response = json_decode($response,true);
        if ($response['error-codes'] && count($response['error-codes']) > 0){
            echo 'Cloudflare Turnstile check failed. Error codes:<br>';
            echo '<ul>';
            foreach($response['error-codes'] as $e){
                echo '<li>'.$e.'</li>';
            }
            echo '</ul>';
            echo '<br><br>Output from Cloudflare:<br><br>';
            print_r($response);
        }else{
            echo 'Passed Cloudflare Turnstile check.<br><br>Output from Cloudflare:<br><br>';
            print_r($response);
            echo '<hr>';
            // Process the response
            echo 'The submitted form data is : '.$_POST['field1'];
        }
    }

    // Close cURL
    curl_close($curl);
?>
Perform the HTTP POST request with the required information and you should get the response from Cloudflare. If the challenge passes, just process the form submission.
That’s all! Here’s the demo again. Enjoy!